Today marks a significant milestone, and I am thrilled to share this exciting development with you. Some time ago, Gaurav Mahajan invited Scott Brewster and me to join him and co-author Sudeep Ghatak in a collaborative effort that promised to revolutionize how professionals navigate Microsoft 365. The result of our collective endeavor is the book: “Microsoft 365 and SharePoint Online Cookbook: A complete guide to Microsoft Office 365 apps including SharePoint, Power Platform, Copilot, and more”.
This book is a comprehensive navigator for enhancing collaboration, boosting productivity, and harnessing the full potential of Microsoft 365. It covers a broad range of topics from SharePoint and Microsoft Teams to Power Automate, Power Apps, Power BI, and beyond, offering over 100 practical recipes designed to help you leverage Microsoft 365’s suite of tools to their fullest potential.
Published by Packt, this invaluable resource is now available for purchase. We were also fortunate to have Mark Kashman write a foreword for us, for which we are profoundly grateful. ❤️
Key Features
Enhance collaboration and productivity: Learn to use SharePoint, Teams, OneDrive, Viva apps, Planner, and Microsoft Forms to foster a collaborative and productive environment.
Automate processes: Build apps, bots, and dashboards with Power Automate, Power Apps, Copilot Studio, and Power BI, streamlining your workflows and processes.
Leverage Copilot: Explore how Copilot, the new AI virtual assistant, can provide seamless support in your everyday tasks.
Who This Book Is For
This book caters to anyone stepping into the world of Microsoft 365, from business professionals and IT administrators to enterprise architects. It offers valuable insights for establishing a contemporary, digital workplace effectively. Additionally, its comprehensive coverage makes it an excellent gift for Microsoft 365 enthusiasts in your life.
Join us in this exciting journey with the Microsoft 365 and SharePoint Online Cookbook. Your support is greatly appreciated, and I look forward to hearing about your thoughts and successes as you explore the wealth of information provided in this guide.
Efficiently managing and communicating team availability in a hybrid world is crucial for smooth operations in any organization. This guide will show you how to create an automated yet interactive system for tracking and communicating the availability of general staff members using Power Automate, Microsoft Teams, and SharePoint.
Weekly Availability Surveys: Each Friday, staff members receive a personalized survey through a Teams chat message to submit their availability for the following week.
Confirmation and Preview: Upon submission, staff members get a confirmation message and a preview showing the team’s availability as of the time they submitted their own.
Comprehensive Monday Update: On Monday, everyone receives a complete overview of the team’s availability for that week, helping them make the most of everyone’s availability.
Video demonstration
The following video will demonstrate steps 2-3 (building the SharePoint list, and walking you through the Power Automate flow).
Step 2: Setting Up SharePoint
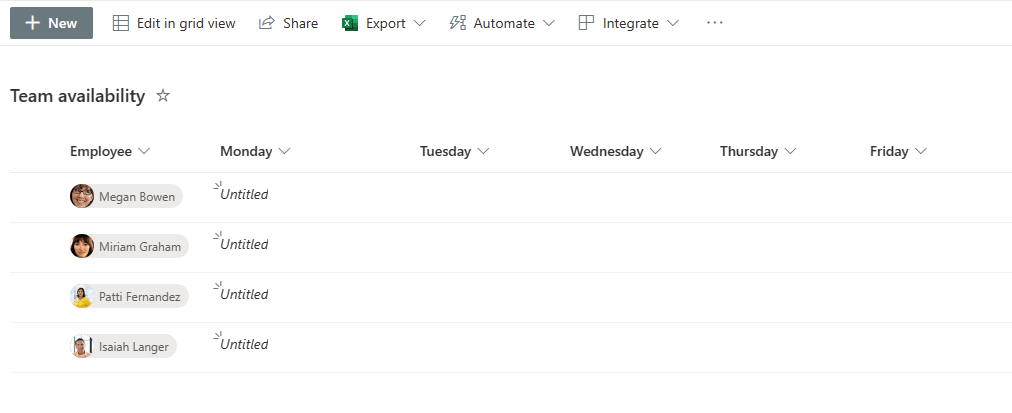
Create a SharePoint List: Establish a SharePoint list for logging staff availability. Ensure it’s accessible to all staff members who will be participating and/or reviewing availability of teammates. It needs:
A person column type for Employee
5 single line of text columns – one for each weekday. In my demo, I’ve repurposed and renamed the default Title column for Monday.
The supporting SharePoint list upon creation | Click to enlarge
Manage Permissions (optional): Assign appropriate permissions to staff members to view and edit the availability list. In order for someone to submit their availability via the chat request, they’ll need Contribute or Edit access at least. If you added the list to a site accessible to all relevant team members, they already have access to edit the list by default.
Step 3: Automating with Power Automate
In-Office Status Survey Flow:
Trigger: Schedule to run every Friday at 10:00 AM.
It should first gather data from the SharePoint list (Get items) to know whom to ask for their availability
Before asking an employee for their availability, I use the following in my Update item step’s Monday, Tuesday, Wednesday, Thursday, and Friday fields to reset them each week:
⏳ Requested
Post an Adaptive Card : The chat message to each employee uses the ‘Post an adaptive card and wait for a response’ action. For the Message of the adaptive card step, utilize the provided JSON below. The only thing you’d want to update is the company logo URL to include your own. You could also adjust things like ‘Telework’ to ‘Work from home’ or any other verbiage you choose.
Get the updated list of availability (Get items 2) including the new response, making sure to use the following filter query to only get rows where people have responded for the coming week:
Title ne '⏳ Requested' and Title ne null
After someone responds, they’ll get a chat preview of the whole team’s availability for the week.
In-Office Status Results Flow:
Trigger: Schedule to run every Monday at 9:00 AM.
This flow compiles survey responses into an HTML table (similar to how we did the first flow) and distributes it to the team via a Teams group chat message where they can ask follow-up questions, provide additional context, coordinate meetings, etc.
Important – Exclude the Sender: The sender/owner of the flow should not be included in the Monday communication to recipients (assuming they’re using their credential to connect for that step in the flow). Since they’re the one connecting to Teams via Power Automate, they’re already included in the eventual group chat. Attempting to include them will result in an error.
Conclusion
By following these steps, you can set up a streamlined and automated process to manage the availability of your team. This system not only saves time but also ensures clear and consistent communication among all staff members.
When you’re finished using a list in SharePoint Online, you may wish to delete it. Sometimes you’re at the end of a project and have no need to keep the list’s information, and other times you may have just been testing out capabilities and are ready to clean up.
Note You must be a site owner or site member to delete a list by default. List permissions can be changed, however, so that even as a member you may not have the ability. Check with your site’s owner if you’re running into an issue when following these steps.
Delete a SharePoint list
To delete a list in SharePoint Online, follow these steps:
Go to the list you wish to delete
Select the settings wheel in the upper right corner, then List settings.
Select Delete this list and click OK when prompted in your browser.
Location of Delete this list option | Click to enlarge
Restore a previously deleted SharePoint list
Items, including lists, remain in your site’s recycle bin for 93 days once deleted. Site owners have access to a second-stage recycle bin from which they can restore “double deleted” items (when someone empties the main recycle bin, or deletes a specific item from it).
As long as you’re within the 93-day window, follow these steps to restore a SharePoint list:
Go to your site’s Recycle bin (may be on the navigation menu, or in your Site contents (settings wheel in upper right > Site contents).
Select the deleted list
Choose Restore
Steps to restore a deleted SharePoint list | Click to enlarge
Here’s a video demonstration of the deletion and restoration process for SharePoint lists:
I had a unique challenge recently to alternate assignment of requests (tracked in a SharePoint list) to individuals as they were created. User #1 would get requests 1, 3, 5, etc. and User #2 would get requests 2, 4, 6, etc. To make it more interesting, different pairs of experts might be assigned to different request topics, and sometimes a single individual would be responsible for a particular topic. The overall idea, though, was a somewhat evenly dispersed workload given quickly and efficiently to those who were responsible for those request areas.
One (less than ideal) option to accomplish this is to use a Get Items (SharePoint) step on the requests list with a Top Count of 1 and Order By OData query (Created desc) for the most recently created request, see who the assignee is, and then assign to the other person in that category’s assignee field (when applicable). But I needed something that was better-performing, sophisticated, simpler in design, and not dependent on any historical items in case they were deleted, re-assigned, etc.
So, to determine the assignment as requests randomly trickle in over time, I decided to have Power Automate determine whether a new request’s ID number (auto-generated by SharePoint) is odd or even. Odd requests would go to the first assignee of a subcategory, and even would go to the last. If there was only one assignee in a category, they’re both the first and the last so it still works.
A general good practice when building flows is to make sure you don’t put a particular assignee’s identity explicitly in a variable, task, or email step. For example, you wouldn’t want to put user #1’s email directly in an Outlook email step’s To line. This makes sure that if an employee leaves the company, that the flow won’t need a revision. Instead, I created a list in the team’s SharePoint site with request categories, sub-categories, and responsible persons. My flow refers to this list each time it needs to make an assignment, making sure it has up-to-date contacts for each subcategory.
Example of a request categories list | Click to enlarge
The managers of the process keep this updated with no more than two assignees per subcategory. This way, when new employees join, the list gets an update for what subcategories they’ll be handling, and the flow continues without a hiccup.
What you’ll need to build this solution
Overall, for this process to work, you’ll need:
A list of request categories with these columns:
Category (choice)
Subcategory (text or choice)
Assignees/Responsible (person with multi-select enabled)
A list of requests (submitted via a SharePoint form, Microsoft Forms form via Power Automate, or Power Apps app via Power Automate)
I’d recommend Power Apps if you have the time and resources – this way your choices (categories and subcategories) in the form can be dynamic (only have to be managed in one place) and reference your categories list without granting access to the main request list, or even the SharePoint site, itself
Consider adding additional fields for your assignees like Notes, Status, Priority, etc. for them to add additional context, reminders, and status updates as they work the requests
The Power Automate flow for assignment determination
See the rest of this post to see how the rest of it can be built
How to build a flow that assigns tasks evenly and by category
The following video will walk you through the necessary components to build this flow in Power Automate. The result will dynamically assign tasks to responsible persons based on categories they’re responsible for, as well as alternating tasks to help distribute workloads more evenly within each category.
Ideas to enhance your categories list with additional fields for different assignment scenarios
Consider taking this concept further by adding additional columns to your categories list. Things like:
Sequential assignment (Yes/No) – Assign to the first person in the multi-select person field and if they don’t mark it complete within 2-3 days, add the second person as an assignee.
Assign to all (Yes/No) – Maybe some subcategories should have all assignees involved in the resolution. A simple checkbox would have the flow assign to both (when applicable).
Request specific assignment (Yes/No) – Not everything can be randomly or evenly assigned. You may wish to choose on a case-by-case basis. Set your flow up to send an adaptive card to the process manager(s) asking for selection of an individual for each request that comes in with this Yes/No checked.
If you’ve ever tried to create a new item on a SharePoint list, you may have noticed that the form always includes an Attachments field that can’t be hidden like other columns. If your process doesn’t require attachments or you’d like to prevent users from uploading documents to the list, you’re likely wondering how to get past this obstacle.
End of a SharePoint form with the Attachments field | Click to enlarge
Note Be aware that if users previously utilized the Attachments field, this action would delete all attachments they’ve already uploaded on all list items.
In this post, I’ll highlight the 5 simple steps involved in removing the attachments field for a list’s new item form.
How to remove the attachments field from a list’s new item form
Click Settings | List Settings
Location of List settings | Click to enlarge
Select Advanced settings
Location of Advanced settings in List Settings | Click to enlarge
Set the Attachments radio button to Disabled
Advanced list settings showing the Attachments setting as Disabled | Click to enlarge
Click OK
You’ll receive a warning making sure you’re aware that this action deletes all attachments (if there are any). Click OK.
Warning when saving Attachments setting as Disabled | Click to enlarge
And that’s it! Now your forms will only show fields you’ve created and configured.
End of a SharePoint form without the Attachments field | Click to enlarge
If you’re not able to access or modify List settings, you may not have high enough permissions to modify the list. Check with your site owner to see if they can assist.
Attachments are secondary to the list/form data itself and should be used for specific business processes, such as attaching receipts for reimbursement requests or perhaps photos or screenshots for facility or issue trackers. If the document is independently important, it should be stored in a document library.
Also keep in mind that attachments don’t have version history, cannot be renamed or reorganized without downloading/re-uploading, and they are not searchable in Microsoft 365. If you need to search for attachments, you should store them in a document library instead of a list – and you can always use a lookup column or hyperlink column to connect the list and library.
In Power Automate, setting an already-populated SharePoint list or library field to blank isn’t as simple as leaving the field blank in your flow. Luckily, it’s just a couple extra steps to make it possible.
In this post I’ll cover multiple column types as they’re a bit different.
How to set text, date, number, and yes/no column values to blank
How to set single choice column values to blank
How to reset multi-choice column values to blank
How to reset person column values to blank
How to set SharePoint text, date, number, and yes/no column values to blank
The steps in this section will work for these column types:
Single line of text
Multiline text
Date
Number
Yes/No
Click into the field you want to reset to blank
Select Expression
Type Null in the expression box (not case-sensitive)
Click OK
Adding a Null expression in Power Automate | Click to enlarge
Test your flow and it should reset the field value(s) to blank wherever you used the Null expression.
Showing the fields that were reset using Power Automate | Click to enlarge
How to set SharePoint single choice field values to blank
To set a choice field back to blank (no selection) follow these steps:
Add a step before updating the item that initializes a variable. The step is called Initialize Variable.
Set the variable name to Blank, and the type to String. Do not set a value.
In your update action, set the choice field value to the new variable from dynamic content.
Creating a blank variable in Power Automate | Click to enlarge
Test your flow, and you should see your single choice field reset to no choice.
Result of a Power Automate flow resetting a choice field | Click to enlarge
How to reset SharePoint multi-choice column values to blank
A normal choice column in SharePoint has more options that allow it to be set to multiple choice.
Multiple selection option for a choice field in SharePoint | Click to enlarge
Changing a single-select choice column to a multi-choice field alters how Power Automate resets the field, but it’s still similar to the steps involved for a single choice field.
To set a multiple-choice field back to blank (no selections) follow these steps:
Add a step before updating the item that initializes a variable. The step is called Initialize Variable.
Set the variable name to BlankArray, and the type to Array. Do not set a value.
In your update action, select the T icon next to your multiple-choice field.
Set the multi-choice field value to the new variable from dynamic content.
Power Automate actions resetting a multiple-choice field to blank | Click to enlarge
Test your flow and your multi-choice fields should now reset to blank.
Result of a Power Automate flow resetting multiple-choice fields to blank | Click to enlarge
How to reset SharePoint person column values to blank
Perhaps one of the more complicated column types to reset, a person field takes a bit more work to reset. To accomplish this, we can use an HTTP request. Follow these steps to empty a SharePoint person column’s value.
Add the Send an HTTP request to SharePoint step
Following the screenshot below, set the fields as follows (you must replace all red items with your own values):
Site Address (select your site)
Method: POST
Uri: _api/web/lists/getbytitle(‘YOUR LIST TITLE‘)/items(YOUR ITEM ID FROM DYNAMIC CONTENT)
If your list name has a space, replace it with _x0020_ such as Null_x0020_demo.
Field names are different than display names. Even if your field displays with a space (Person field) it is likely Personfield on the backend. You can verify your column’s actual name by going to List settings (gear icon) and selecting your column from the Columns section. Your field’s actual name will be displayed in your browser’s URL.
How your HTTP request should look when finished | Click to enlarge
Test your flow and you’ll find that your person column has been reset.
I had the honor of presenting one of my favorite Microsoft 365 features for the Baltimore SharePoint User Group’s regular meeting last week. You may have seen this particular feature on your lists (individual or in SharePoint): the ability to visualize a list or library’s data using the Power BI service.
Visualize the list menu option for lists and libraries | Click to enlarge
This newer feature of convenient Power BI integration for lists gives you an automatic report based on your list’s data. We explored how to create a report, customize it, and save it back to the list for future one-click access.
Automatically generated report | Click to enlarge
Even if you haven’t used Power BI (yet), this presentation was made for all experience levels and will provide a proper introduction. In this one-hour session, I specifically covered:
How to create an automatic report/dashboard from your list in just a few clicks
How to edit and publish the auto-generated report for others to use
I recently had someone ask me how you could remove the Recycle Bin from a modern SharePoint team site’s left-hand navigation menu. Even if you click Edit on the navigation menu, Recycle Bin disappears as an option you can change. So how can it be done?
While it’s not the most straightforward process, it is possible to remove Recycle bin from a site’s navigation menu but it will require activating the SharePoint Server Publishing Infrastructure site collection feature.
You can change your SharePoint site’s navigation menus and overall theme. This lesson demonstrates how to get started.
This video is part of my FREE 30+ lesson self-paced online training course called Collaboration in Microsoft 365 (OneDrive, SharePoint, and Teams). Enroll today at https://www.NateTheTrainer.com for the full learning experience including lesson discussions, quizzes, exams, and a completion certificate.
You can roll up and display content from across multiple sites in SharePoint Online using the news, documents, and events web parts. This video will demonstrate that process.
This video is part of my FREE 30+ lesson self-paced online training course called Collaboration in Microsoft 365 (OneDrive, SharePoint, and Teams). Enroll today at https://www.NateTheTrainer.com for the full learning experience including lesson discussions, quizzes, exams, and a completion certificate.
The News, Highlighted content, and Events web parts allow you to pull in content from sites other than your current site. So, for example, if you’re building a home page for your site and add a news web part, you can choose to pull in a partner department’s site’s news to your site as well to provide a variety of relevant content to your members.